Create Custom Photo Brushes Photoshop Tutorial
Wednesday, January 6, 2010
Step 1
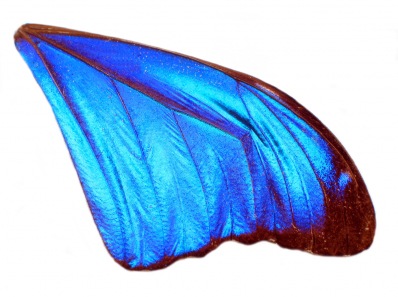
Open Photoshop and open a photo to use as a brush. It should be something that would work in a pattern, where the content of the photo is obvious as various sizes. I'm using this "blue angel wing" I found on iStockPhoto. IT should be relatively large, perhaps 1000 pixels for both width and height. If you create a brush at a small size, setting the brush to a larger size than originally created will cause it to lose resolution. But making it smaller is no problem, just like resizing a photo.
Step 1
Open Photoshop and open a photo to use as a brush. It should be something that would work in a pattern, where the content of the photo is obvious as various sizes. I'm using this "blue angel wing" I found on iStockPhoto. IT should be relatively large, perhaps 1000 pixels for both width and height. If you create a brush at a small size, setting the brush to a larger size than originally created will cause it to lose resolution. But making it smaller is no problem, just like resizing a photo.
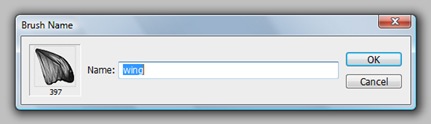
Step 5
Name the brush something that matches the image, and click OK.
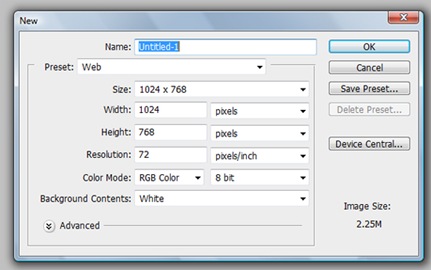
Step 6
Now that we have the brush defined, go to File>New and create a new file at 1024 x 768. Click OK.
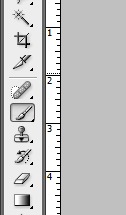
Step 7
Click the Brush tool on the toolbar.
Step 8
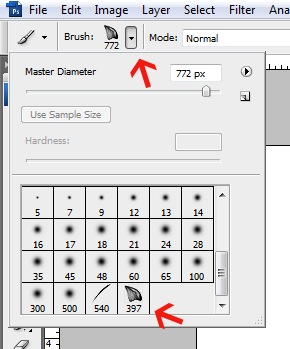
Click the arrow on the Options palette which will bring down the brush styles and size options. Scroll down and click the brush we just created. You can change the size here, or change it by pressing the left and right brackets to make the size smaller or larger. Bring the size of the brush to something much smaller, such as 100.
Step 9
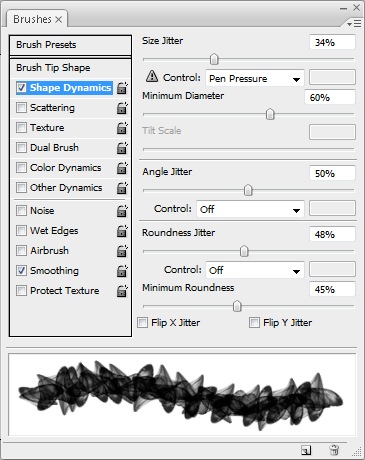
Go to Window>Brushes to bring up the Brushes palette. This palette has a lot of options for the Brush tool. Change the Shape Dynamics to these settings by clicking on Shape Dynamics then sliding the sliders. The brush can rotate to a certain degree as we brush. Try various settings as the preview shows how the brush will look.
Step 10
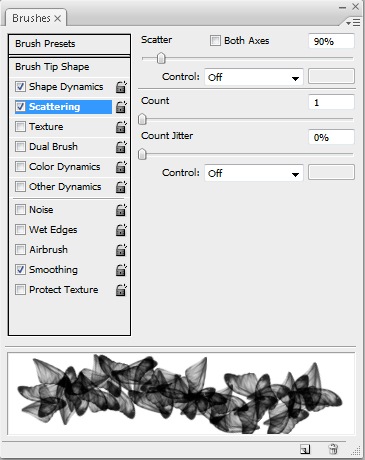
Change the Scattering to the settings shown here. Scattering does just that—scatter the brush as we brush. Try various settings as the preview shows how the brush will look.
Step 11
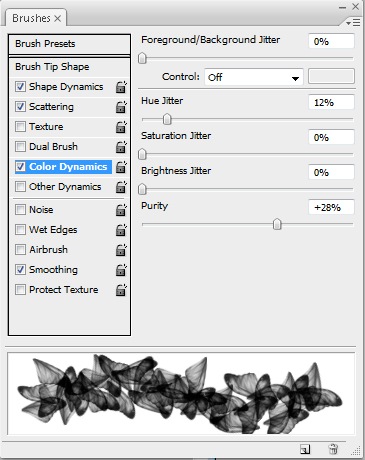
Change the Hue Jitter to 12%, because we want to somewhat adjust the hue as the brush is clicked-and-dragged, but within a certain range. Setting it to 100% would cause it to include the entire color range.
Step 12
Now for the fun part: click-and-drag with the Brush tool in a curve.
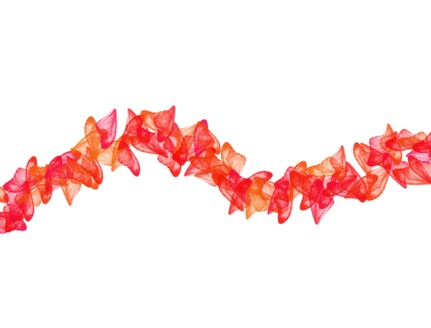
Step 13
Whatever color is selected in the Foreground in the toolbar is the color of the brush. You can have a jitter between the foreground and background color as well as hue jitter from the foreground color.
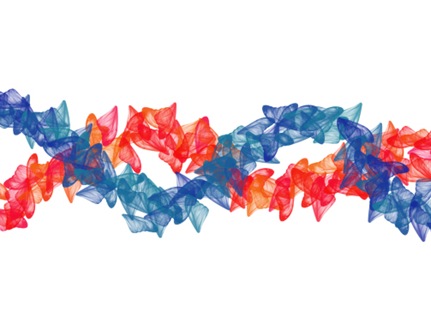
Step 14
If you create a second curved brush path like this, click on New Layer on the Layers palette first, so that we can adjust the layer blending mode on the Layers palette. In this example, I adjusted the top layer blending mode to Multiply.
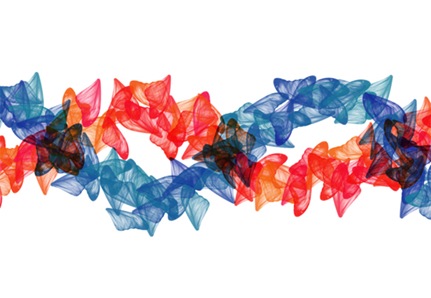
Step 15
Try various photos and converting them to brushes using the same steps here. Brushes with added Shape Dynamics and Scattering can help create a unique background, such as this one created with a photo of Polaroids.

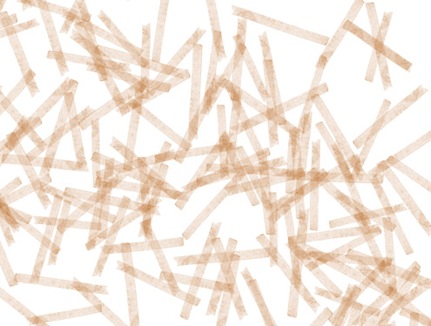
Step 16
This one was created with a scan of tape. Besides creating unique paths, backgrounds are often created with such brushes.
How to Create Furry Text in Photoshop
Step 1
To start open a Photoshop document at 1000 x 1000 rgb and 300 ppi ,you can use a larger size if you want to print this or use it as a wallpaper.
Step 2
Prepare the background by creating a radial gradient from light to dark green. The first stop we use is set to (#003300) and last to (#022100) Drag form the centre outwards holding down shift you should have a lighter centre.

Step 3
Now we’ll create the claws – go to custom shape tool by right clicking the rectangle tool. Set it to fill pixels then choose the dog print (about the ninth shape along the top, if you don’t have them click the small triangle in a circle in the shape menu and select animals) .
Keep the color on 003300(the lighter color from the gradient we just made) and holding shift to constrain proportions click and drag out some paws of different sizes. Make sure you create each one on a new layer so you can rotate them. Holding down alt select each paw and drag a copy to the left and down so it looks like the paw prints of a walking dog . Using auto select layer here is helpful.
Step 5
Rotate each one so they are at different angles- remember to rotate them to the same angle as the paw they are paired with.

Step 6
Now we’ll add depth to the background. What would a tutorial be without layers styles? Here we will add some depth to the paws and create the effect they have made an impression on the background. Double click on the right hand side of a paw layer to bring up layer styles and enter the amounts shown below.

Step 7
When done, hold down alt and drag the layer style to all the other paw layers.

Step 8
Select all the paw layers using shift and hit ctrl + G to group them then rename the group paws. The layers styles and layers are all separate, which is a good non destructive way of working, if we feel like moving or resizing a paw later or even changing the layer style this is easily possible.

Step 9
Now we have the background ready with the paws and we can begin with the main text effect which is a little more fun. For the main text first download this blocky font ,Tiresias Signfont and install it in your fonts file (if you’ve never done this before this is explained nicely on the font site). The good thing about this font is its used for sign systems and works well with the effect we are creating.
Step 10
With the font installed type out 350 which I chose because it’s ‘the number that leading scientists say is the safe upper limit for carbon dioxide—measured in “Parts Per Million” in our atmosphere. 350 PPM—it’s the number humanity needs to get back to as soon as possible to avoid runaway climate change.’ To find out more info visit the charity 350 http://www.350.org/understanding-350#2 Use 129.56 pt for the size and place text slightly above the middle.

Step 11
Next thing download the first fur from Bittbox ,thanks to Caleb and Jay for this one.
Step 12
Resize the fur so it covers one letter with enough space for the effect around the edges ,around 100 pixels will do nicely.

Step 13
Rotate the fur and remember to resize past the edges of the numbers by around 100 pixels.

Step 14
Drag the text layer on top of all the fur layers so your document looks like this.

Step 15
Next we’ll turn the layer visibility off and ctrl + click the text layer to select the text.

Step 16
Now we’ll cut out the text in the fur by adding a layer mask to each fur layer. So with the text selection still active make sure the right layer is active and add a layer mask. Do this for each fur layer, your layers palette should resemble these images:

and your document should look like this:
 Step 17
Deselect the text with ctrl + D . So you should have 3 layers of fur with a layer mask on each.

Step 18
Now is a good time to save your work.Coolness. Now we can make the fur letters furry with a white brush. Choose a suitable brush, I found texture 5 from assorted brushes worked very nicely.
 Step 19
With white as your foreground color and a suitable brush, go around the edges of the letters creating the effect that the fur is going over the edge. Make sure you are working on the layer mask. You basically want to get rid of any sharp edges completely. The great thing about working with layer masks is that if you make a mistake you can easily swap the colors and cover up the brush strokes.
Step 20
Start with a smaller sized brush around 20 pixels Download these brushes from deviant art thanks to ‘keep waiting’ for these. Try out different fur brushes I found fur1 worked very well to produce a light fur effect.

Step 21
Rotate brushes you use for each edge by going to the brush panel and brush tip shape .Try and keep the angle the same as the direction of the fur for consistency.
 Step 22
Get rid of the edges by making them fuzzy, then build up fur whilst rotating the brush.

Step 23
Vary the size and angle of the brush until the letters looks furry.Keep adding fur to the edges use the veining feather brush from the Faux finish set and add shape dynamics with these settings and scattering with these settings. You should be able to build up a good fur effect with this brush.

Shape Dynamics

Scattering

Step 24
Try the brush without scattering or shape dynamics and alter the angle according to the side of the number and the direction of the fur and use lots of single clicks .

Step 25
We’ll now put some larger brush strokes down 50 pixels is a good size.
Step 26
When your ready and all the fur is added to the text merge all 3 fur layers by duplicating them and pressing ctrl + E. If everything went according to plan you will have something close to this:
Step 27
Add these 2 layer styles, bevel and emboss and Drop shadow to this new layer – with these settings. The shadow adds a slight 3d effect to the text.

Bevel and Emboss

Drop Shadow
Step 28
Next create a new layer below the fur layer and ctrl click the fur layer and fill it with a very dark green .Nudge it with the arrow keys down 9 times and right 9 times. Then reduce the opacity to 63%.
 Step 29
Duplicate the shadow layer by pressing ctrl + J ,now we’ll use the motion blur set to 120 ,to match the global light and other shadows and distance at 42. Holding down shift nudge this layer down once and to the right once .

Step 30
Duplicate the previous layer holding shift nudge it nudge twice to the right and twice down then reduce the opacity to 18 % and the shadow and 3d effect is done.Happy Days.

Step 31
Select the three shadow layers and the text layer together using shift and then hit ctrl + T to free transform, then resize the letters and shadows to 73 % of their original size.You can see the percent change at the top below the menu ,pressing the ‘Maintain Aspect Ratio’ button will constarin the proportions.

Step 32
Now we’ll add some extra text use the fornt we downloaded before - Tiresias Signfont .Set it to bold at 18 points then type out ‘GLOBAL WARMING’ using this color : # 436605.Were nearly all done now : ) Finally we’ll add this layer style to add a letterpress effect, because global warming awareness is trendy too.

Inner Shadow
To Conclude:

We are all done, I hope you enjoyed this tut as much as I enjoyed creating it ,if you enjoyed it too and would like to see more please subscribe via RSS or make a comment, because we love feedback.
Free PSD
The PSD file is available for download free from here.